When my girls and I have visited Disney World one of our favorite things to do is collect autographs from the characters. We love tracking down all their favorite characters, chatting with them, and then getting that special autograph.
I’ve started an Etsy store with beautiful pages for all the characters you might encounter in the Disney World parks or character meals.
The characters my girls met LOVED these pages and people standing in line with us to meet characters kept asking where I’d gotten the books from and remarked at how pretty they were. Even the photographers working with the characters wanted to take a moment to flip through my girls’ books. They were a huge hit!
We had many fun moments with characters such as,
Gaston flipped through the entire book and said each of the pages should be of him.
Flynn Rider made fun of the “frog” on Rapunzel’s signature spot.
Mary Poppins launched into a story about outings with Bert and flying kites.
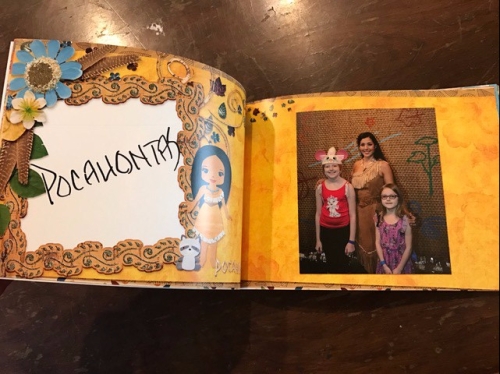
Pocahontas told my girls a story about a canoe race with Meeko the raccoon.
Ariel loved pointing out the dinglehopper and the little fish on her page.
Captain Jack Sparrow launched into a long rant about having his page opposite Scrooge Mc Duck and exclaimed “Whoever heard of a Scottish duck!”
Even the furry characters loved pointing to their likenesses on the pages.
The pages are all available as digital downloads, in either 5×7 or 8×8 inches, which you can then print individually on your printer from home or at any photo printing site. Or you can upload your pages to places like Shutterfly or Wallmart to have your pages bound into books.
You can build your own book by selecting the just pages you want to add or purchase one of the premade collections which feature: princesses, favorite characters, animal friends, or princes/pirates/and space friends (Star Wars).
For my blog readers I have a 15% off coupon for your total purchase. Enter coupon code 15OFF when you make your order. Valid through July 31, 2017.
Princess set includes autograph page and photo page for the following:
Anna
Ariel with fin
Ariel with dress
Aurora
Belle in the blue dress
Belle in the yellow dress
Cinderella
Elena
Elsa
Jasmine
Merida
Moana
Mulan
Pocahontas
Rapunzel
Snow White
Sofia the First
Tiana
8×8 (not all princesses shown)


5×7 inches (not all princesses shown)


Animal Friends includes:
Baloo
Chip
Dale
Chip and Dale together
Daisy
Donald
Dug
Eeyore
Flik
Goofy
King Louie – does not sign- only includes photo page
Lady and the Tramp — You can get their paw prints at Tony’s Town Square
Mickey
Minnie
Olaf-he’s not an animal but seems kind of like a pet??
Piglet
Pluto
Pooh
Rafiki
Stitch
Tigger
8×8 (not all characters shown)

5×7 (not all characters shown):

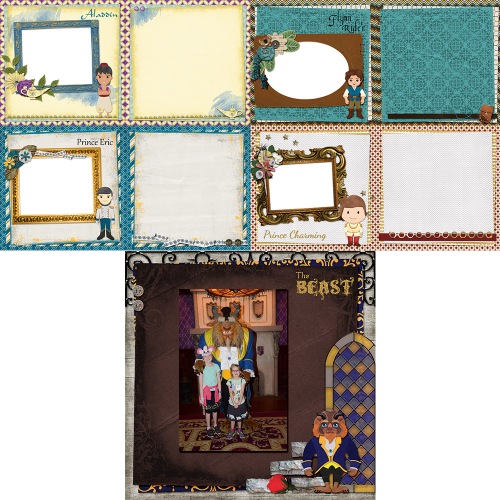
The princes, pirates, and space set includes the following characters:
Captain Hook- Can meet at Pirates and Pals Fireworks Voyage
Jake
Smee – Also at the Pirates and Pals Fireworks Voyage
Aladdin
Beast – doesn’t sign, so just includes photo card, but you can get a photo with him after dinner at the Be Our Guest restaurant
Flynn Rider – New character breakfast being offered at Trattoria al Forno at Disney’s BoardWalk
Prince Charming – Meets at 1900 Park Fare Dinner at Grand Floridian
Prince Eric – Will also begin meeting at Trattorias
Chewbacca
Kylo Ren
Jawas
Storm Trooper
Darth Vader – Part of the Jedi Training Experience
Seventh sister – Part of the Jedi Training Experience
None of the Star Wars characters sign, so they only include a photo card, but they are very fun to interact with


5×7

The favorite characters set includes everyone else:
Alice
Anastasia
Baymax – Does not sign so only includes photo page
Buzz Lightyear
Doc Mc Stuffins
Drizella
Fairy Godmother
Gaston
Green Army Man
Handy Manny
Incredibles Dance Party – They dont sign, they only dance but you can dance with them and take some photos while dancing. Usually includes Mr. and Mrs. Incredible and Frozone
Joy
Lady Tremain
Mad Hatter – Meets with Alice at the Wonderland Tea Party at the Grand Floridian
Mary Poppins
Peter Pan
Russell
Sadness
The whole Step Family Together (Anastasia, Drizella, Lady Tremain)
Tarzan
Tinker Bell
Woody
8×8 (not all characters shown)


5×7 (not all characters shown)


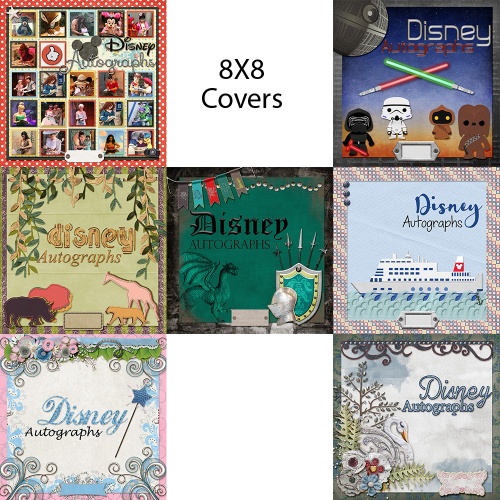
I also have a set of covers that includes generic pages for any surprise characters you encounter. We’ve randomly met Mushu, Bert, and the Evil Queen once at Hollywood Studios and came across Tweedle Dum and Tweedle Dee at Magic Kingdom! So it’s handy to have these extra pages in case you encounter any special unannounced characters too!
This set includes:
Disney characters signing autograph books cover
Star Wars Cover
Princess cover
Princess cover option 2
Disney Cruise cover
Animal themed cover
Prince themed cover
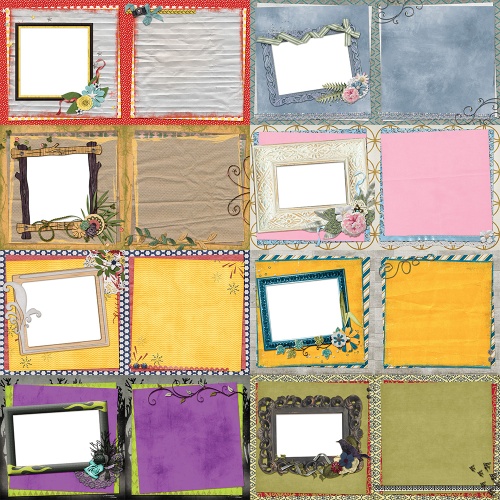
8 sets of generic character pages which each include autograph and photo pages:
Villain themed
Villain themed version 2
Jungle themed
Princess themed
Princess themed version 2
Prince themed
Disney colors themed
Disney colors themed version 2
8×8

5×7 (not all shown)
If you’re looking for less fancy pages I do offer the 5×7 size with a slightly less embellished design.
These simpler 5×7 pages are offered in each of the packs: princess, prince/pirate/space, animal friends, favorite characters, and the covers/extra pages.
Not all shown:
Finally, here is a sample printed and bound book using the 5×7 digital pages. I had this one printed at Walmart. I’ve also printed these pages in bound form from Shutterfly and as individual pages at Costco with no problems. I did find that Walgreens and Snapfish seriously cropped the images when I wanted to print a book so I don’t recommend using them for bound books- I’m sure they would be fine for individually printed photos.